We may earn a commission from the affiliate links on this site. Learn more›
Are you a drummer looking for the best audio interface to record your drums? In this article, we will dive into the world of audio interfaces and explore the top eight options available.
Audio interfaces, like the Focusrite Scarlett 18i20 and Behringer U-PHORIA UMC1820, offer a variety of inputs and outputs, mic preamps, and connectivity options. Whether you need just a few inputs for a simple recording for Instagram or an entire close-mic setup to capture the whole kit, we’ve got you covered.
When it comes to recording drums, you don’t necessarily need a mixer. An audio interface with preamps, headphone output, and low latency can do the job perfectly. It all depends on your individual needs and desired sound quality.
Key Takeaways
- The Focusrite Scarlett 18i20 (3rd Gen) is the best audio interface for recording drums that’s both quality and budget-friendly.
- The number of preamps needed for drum recording depends on the number of input sources. Still, all reviewed interfaces have eight built-in preamps.
- 6 to 8 inputs are industry standard for multi-channel drum recording, but the decision on the number of inputs depends on budget, desired sound, and drum kit size.
- A mixer is unnecessary for recording drums, as an audio interface with preamps, headphone output, and low latency is sufficient.
My Drum Recording Setup

I have a home studio setup and I record a lot of local bands. Typically, we use drum samples with software like EZDrummer 3 or Superior Drummer, but in some cases, bands want to record their own drums. My setup is hybrid.
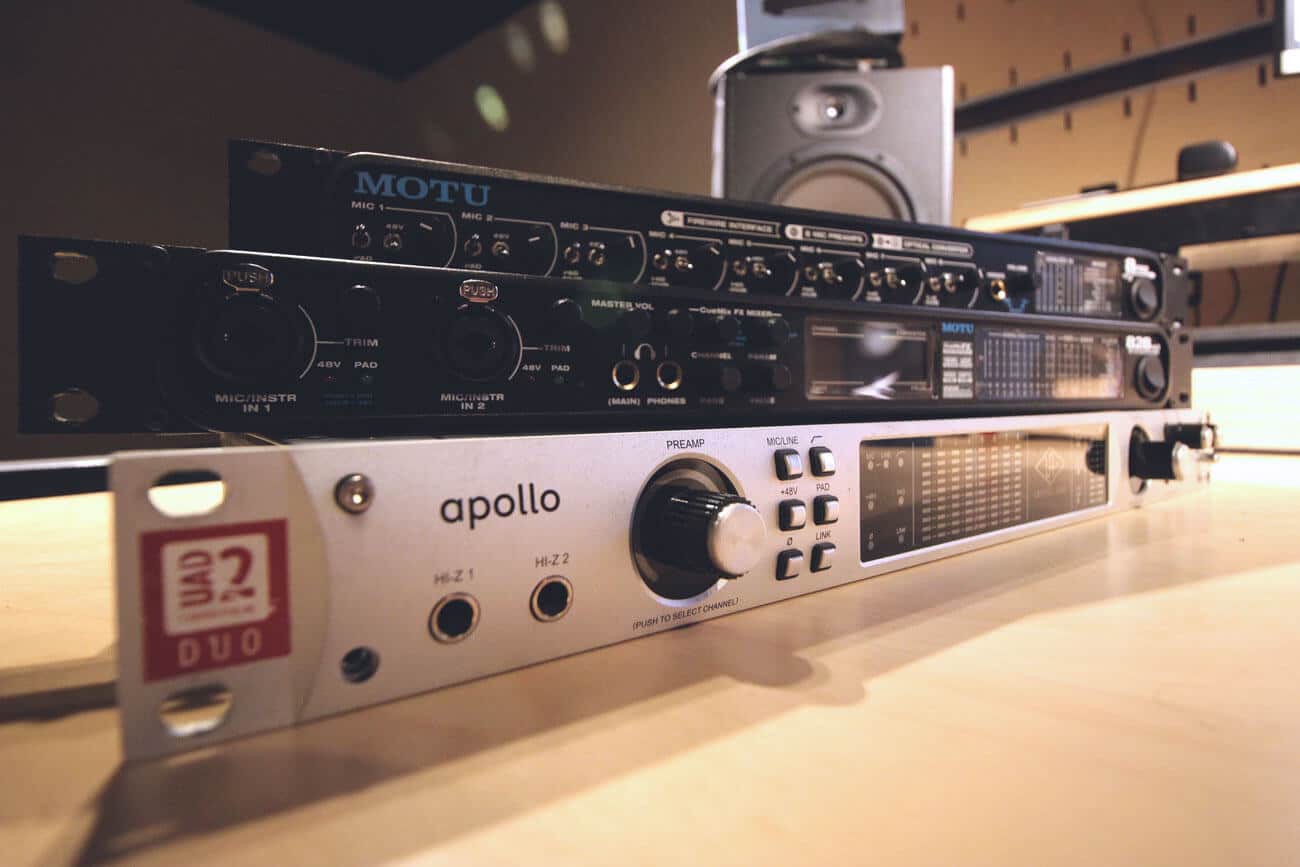
At the moment, I use a RME Fireface UFX III, which is definitely overkill for most drummers looking to record themselves at home. The interface has four XLR inputs on the front of the unit, which will get you clean preamps for recording kick, snare, and overheads.
RME’s monitoring software is incredible. TotalMix makes audio routing a cinch, once you learn the software. Initally, it’s overwhelming, but the power is unmatched by any other audio interface. It syncs with my iPad (iOS only) and allows me to control my mix downstairs when I’m away from my computer and at the drums.
I also have a Universal Audio Apollo 8 which gives me four more awesome-sounding, clean preamps for other mics like kick out, snare bottom, and a room mic. For all the other close mics, my final piece of gear is the MOTU 8pre, which I record toms and hi-hat.
But for beginners…
The Focusrite Scarlett 18i20 3rd Gen USB Audio Interface is the best choice. It features a rack-mountable design, renowned mic preamps, and USB-C connectivity. Just like the RME, Focusrite has a free app for remote control, but I think it’s also iOS only.

 Focusrite Scarlett 18i20 3rd Gen USB Audio Interface
The Focusrite Scarlett 18i20 is by far the best and most affordable audio interface for drummers looking to record themselves at home.
The Focusrite Scarlett 18i20 3rd Gen USB Audio Interface is an essential tool for any drummer. With its high channel count and professional-quality audio, this interface captures every drum hit precisely. The eight 3rd Generation Scarlett mic preamps provide superior sound quality. At the same time, the Air mode recreates the effect of Focusrite’s renowned ISA mic pres, adding high-end detail to vocals and acoustic instruments.
The Scarlett 18i20 offers various connectivity options, including ADAT input and output for up to eight additional channels, MIDI and S/PDIF connectivity, and USB-C compatibility with MacOS and Windows. Its loopback feature allows for easy streaming and sampling. You have everything you need to start recording immediately with the included Ableton Live Lite, Avid Pro Tools Artist, and Hitmaker Expansion software.
Though I no longer use a Scarlett for my recordings, I know that this interface from Focusrite is tried and true—it’s fantastic for a first interface if you have the budget. Focusrite has worked out most kinks we saw in the earlier generations, and the interface is the best bang-for-buck option for new drummers looking to record drums with eight channels.
Hands-On With The Scarlett
There are two microphone inputs on the front of the drum recording interface. The other six are located on the reverse side of the unit. Each knob corresponds to a different microphone channel input.
You can adjust your microphone gain here before it hits your computer. To the right of the knobs is a nice display, giving you a clear sight of all your microphone inputs.
Next up are the monitor and headphone control pots. You can plug a set of studio monitors and two headphones into this unit.
The preamps on the Scarlett 18i20 are very clean. You’re not going to want colorful preamps for your general recording interface. You want the cleanest signal you can get from the source to allow you to add EQ, compression, and other effects inside your DAW during mixing.
This drum recording interface sounds fantastic for the money compared to everything else on the market. It will work wonders if you take things slow and apply the right skills to your drum recordings.
This goes for every interface on the list: if eight channels aren’t enough, check to see if the interface has an ADAT connection. You can get eight more channels of mic preamps via ADAT with something like the MOTU 8pre.
Product Specs:
- Eight 3rd Generation Scarlett mic preamps
- Air mode for added detail
- High-impedance instrument inputs
- Ten balanced outputs with Anti Thump speaker switching
- Two headphone outputs with individual-level controls
- ADAT input and output for expansion
- USB-C connectivity
- MIDI and S/PDIF connectivity
Pros:
- Superior sound quality with hi-res converters
- Low latency for better takes
- Easy audio routing with Focusrite Control software
- Premium build quality
- Wide range of included software tools
Cons:
- UK/ROW power compatibility only (may require an adapter in some regions
- Limited stock availability
 Behringer U-Phoria UMC1820 USB Audio Interface
USB 2.0 Audio Interface, 18-in/20-out, with 8 Microphone Preamps, ADAT I/O, S/PDIF I/O, MIDI I/O, and Dual Headphone Outputs - 24-bit/96kHz Resolution - Mac/PC
The Behringer U-Phoria UMC1820 USB Audio Interface offers a wide range of features and excellent sound quality, making it a great choice for musicians and producers.
With its eight input channels and great preamps, you can record multiple inputs simultaneously. The UMC1820 includes two headphone jacks for separate mixes, real-time monitoring, and MIDI IN/OUT capabilities. Whether you’re setting up a 7.1 surround mix or live software mixing, this interface has the potential to meet your needs.
Regarding sound quality, the UMC1820 delivers excellent results with low noise floor and comparable preamp and A/D conversion to more expensive gear like Apogee. It is suitable for both live instruments and analog-only setups. The intuitive MIX/MONITORING knob allows standalone monitor control or recording/playback adjustments.
While some users may prefer other brands like Focusrite due to brand perception or snobbery around Behringer, the UMC1820 still offers excellent value for its affordable price. Its solid build quality and packed features make it suitable for home studios and professional setups on a budget.
Product Specs:
- Eight input channels with great preamps
- Two headphone jacks for separate mixes
- Real-time monitoring and MIDI IN/OUT
- MIX/MONITORING knob for standalone control
- Potential for 7.1 surround mix setup
Pros:
- Affordable price compared to other brands
- Comparable to higher-end gear in terms of quality and features
- Suitable for home studios and professional setups
Cons:
- Condescension around the Behringer brand affects the perception
- Very much entry-level
- No word clock IO
- Some prefer other brands like Focusrite or PreSonus
 Audient EVO 16 USB Audio Interface
24-in/24-out USB Audio Interface with Multichannel Smartgain, 8 Preamps, 2 JFET Instrument Inputs, 2 Headphone Outputs, and High-resolution TFT-LCD Screen - Mac/PC
If you’re searching for a USB audio interface for recording drums that offers professional features and a user-friendly design, the Audient EVO 16 is worth considering. The EVO 16 is part of the EVO series of interfaces made by Audient, known for its analog mixing consoles.
It features eight analog inputs with mic preamps, eight line outputs, two independent headphone outputs, digital I/O with ADAT Lightpipe and stereo S/PDIF formats, and a word-clock output for device synchronization. The EVO 16 has a sturdy metal construction and can be rack-mounted with an optional kit. It also features a high-resolution color display with Motion UI for clear visual feedback and precise gain control from software or unit through its Smartgain feature.
Overall, the Audient EVO 16 provides a friendly and intuitive user experience.
Product Specs:
- Eight analog inputs with mic preamps
- Eight line outputs
- Two independent headphone outputs
- Digital I/O with ADAT Lightpipe and stereo S/PDIF formats
- Word-clock output for device synchronization
Pros:
- Professional features in an affordable package
- Sturdy construction suitable for desktop or rackmount use
- The Smartgain feature allows precise gain control and prevents clipping
- High-resolution color display with Motion UI provides clear visual feedback
Cons:
- LED illumination behind numbered buttons may be difficult to see in daylight
- Power cycling resets headphone levels and main monitor volume to zero
 PreSonus Studio 1824c USB-C Audio Interface
18-in/18-out USB-C Audio Interface with 8 XMAX Preamps, ADAT I/O, S/PDIF I/O, MIDI I/O, Word Clock Output, DSP Monitor Mixer, Studio One Artist DAW, and Studio Magic Plug-in Suite - Mac/PC
The PreSonus Studio 1824c USB-C audio interface offers a professional-grade solution when you’re ready to elevate your drum recording setup. It provides a 24-bit, 192 kHz audio resolution, ensuring pristine sound quality for your drum recordings. The interface offers analog and digital I/O options, including an 18×8 DSP mixer, giving you plenty of connectivity options for various recording setups.
The Studio One DAW license included with the interface allows for seamless integration and an intuitive workflow. Additionally, the compatibility with the UC Surface touch-control app enhances control and customization capabilities.
Presonus hasn’t been my favorite audio brand over the years. The first audio interface I used to record drums was the FireStudio. I could daisy-chain two together to allow for 16 total mic preamps. This interface used a firewire connection, and I found it highly unreliable in my setup. However, since discontinuing the firewire connection on interfaces, USB is far more reliable and a superior format.
Product Specs:
- 24-bit, 192 kHz audio resolution
- Analog and digital I/O with 18×8 DSP mixer
- Includes Studio One DAW license
- Compatible with the UC Surface touch-control app
Pros:
- High-quality audio performance
- Versatile connectivity options
- Seamless integration with Studio One DAW
- Customizable control through the UC Surface app
Cons:
- Additional learning curve for beginners
- A limited number of inputs compared to other interfaces
- USB-C connection may not be compatible with all devices
 TASCAM US-16x08 USB Audio Interface
16-in/8-out USB 2.0 Audio Interface with 8 Microphone Preamplifiers, All-analog I/O, and Onboard DSP for Mixing and Input EQ/Compression
For a more affordable and user-friendly option, consider the TASCAM US-16×08 USB audio interface. It offers decent performance and a straightforward installation process. Although it may not have the highest quality input AD converters, it still provides stable performance and decent DA conversion. The virtual mixer with EQs may not be usable due to poor quality for monitoring. It does perform well when tracking drums.
Product Specs:
- Stable performance
- Decent DA conversion
- Poor quality input AD converters
- Unusable virtual mixer with EQs
- Subpar compressors
Pros:
- Affordable price point
- Good value for money
Cons:
- Not suitable for vocal or pronounced instrument recording
- Noticeable hiss in quiet passages
- Thin sound when recording certain instruments
 MOTU 8M 24x24 Thunderbolt / USB 2.0 Audio Interface
24-in/24-out Hybrid Thunderbolt/USB 2.0/iOS Audio Interface with 8 Mic Pres, V-Limit Clipping Protection, 8 TRS Outputs, ADAT and S/PDIF Digital I/O, AVB Ethernet Compatibility, and 48-channel DSP Mixer Onboard with Processing and Effects - Mac/PC
The MOTU 8M 24×24 Thunderbolt / USB 2.0 Audio Interface with AVB offers a seamless and professional recording experience. It delivers exceptional sound quality and versatile connectivity options. With its Thunderbolt and USB 2.0 compatibility, you can easily connect the interface to your computer or other devices for smooth data transfer and low-latency performance. The AVB (Audio Video Bridging) feature allows for flexible networking capabilities, making it suitable for studio and live settings.
This audio interface boasts impressive specs. It includes a high-resolution 24-bit/192kHz sample rate, eight XLR/TRS combo inputs with preamps, eight balanced outputs, MIDI I/O ports, headphone output with independent volume control, and built-in DSP processing. It also supports multiple digital formats such as ADAT optical, S/PDIF coaxial, and Word Clock.
MOTU makes some of the most reliable audio interfaces I’ve enjoyed using over the years with my band. For my playback system, I never once had an issue with dropouts using their 828 MK2 (it’s a similar USB interface but has fewer audio inputs and is older). We also used a MOTU 8pre for additional inputs in conjunction with our Behringer X32 rack.
Pros:
- Exceptional sound quality
- Versatile connectivity options
- Low-latency performance
- Flexible networking capabilities
- High-resolution sample rate
Cons:
- Higher price point compared to some competitors
- It may require additional cables or adapters for specific setups
- It can be complex to set up and configure initially
 Universal Audio Apollo x8p Heritage Edition Audio Interface
16-in/22-out, 24-bit/192kHz, Thunderbolt 3 Audio Interface with 8 Unison Preamps, LUNA Compatibility, Premium Plug-in Suite, and Realtime Analog Classics Plus Plug-in Package - Mac/PC AAX 64, VST, AU, RTAS
Experience the unparalleled power and sonic excellence of the Universal Audio Apollo x8p Heritage Edition. This audio interface delivers studio-quality recordings and seamless integration with your digital audio workstation.
The Apollo x8p features a 16 x 22 Thunderbolt 3 audio interface and UAD DSP, specifically designed to meet the demanding needs of professional musicians and producers.
With eight onboard Unison mic preamps, the Apollo x8p ensures pristine sound capture for your drum recordings. Its elite-class conversion technology provides a wide dynamic range and low noise, allowing you to hear every detail in your recordings.
One of the standout features of the Apollo x8p is its near-zero latency recording through preamps emulating legendary brands like Neve, API, Manley, and more. This allows you to achieve a classic analog sound while working in real time.
Another impressive capability of the Apollo x8p is its ability to link up to four Apollos, providing an impressive 156 channels of premium I/O capability.
The Apollo x8p seamlessly integrates with the LUNA Recording System software, offering a comprehensive analog studio experience with built-in features like API console modeling and genuine Neve summing.
Regarding specifications, the Apollo x8p boasts an 18 x 22 Thunderbolt 3 audio interface, eight Unison-enabled microphone/line preamps, and real-time UAD HEXA Core Processing. It is also compatible with the LUNA Recording System. It can run UAD Powered Plug-Ins via VST, Audio Units, and AAX.
Some pros of the Apollo x8p include its wide dynamic range and low noise for professional sound quality, real-time recording through authentic mic preamp emulations, expandable I/O capabilities by linking multiple Apollos, and seamless integration with the LUNA Recording System software.
However, there are a few cons to consider. The Apollo x8p has a higher price point than other audio interfaces on the market. It also has limited compatibility with certain DAWs or operating systems and requires Thunderbolt connectivity for optimal performance.
The biggest drawback I’ve found with UAD is their powered-plugin ecosphere. Their plug-ins are notoriously expensive, outdated, and use a TON of DSP (digital signal processing). However, it is nice that you can monitor with their plug-ins in real time. Depending on which UAD interface you have will determine how much DSP is allocated for use with their plug-ins. Despite the marketing, there’s no reason to purchase within their plug-in ecosystem when we have fantastic options from Waves, Soundtoys, FabFilter, and others.
 Lynx Aurora (n) PRE 1608-TB3 Thunderbolt 3 Audio Interface
16-in/8-out 24-bit/192kHz A/D-D/A Converter with 2 Pre-installed LM-PRE4 Modules and 1 LT-TB Card
Immerse yourself in the pristine sound quality and seamless Lynx Aurora (n) PRE 1608-TB3 integration. With its thunderbolt connectivity and LM-PRE4 module, this 16-channel AD/DA converter offers exceptional audio fidelity and flexible connectivity options.
The Thunderbolt 3 interface lets you connect the Lynx Aurora (n) PRE 1608-TB3 to your Mac or Windows PC for fast and reliable data transfer. This ensures you can precisely capture every nuance of your drum recordings.
The LM-PRE4 module provides high-quality microphone preamps that deliver transparent and detailed recordings. This means you can rely on the Lynx Aurora (n) PRE 1608-TB3 to capture the true essence of your audio.
Regarding specifications, the Lynx Aurora (n) PRE 1608-TB3 features a 16-channel AD/DA converter and a Thunderbolt 3 interface. This combination of features makes it a powerful tool for any audio production setup.
While the Lynx Aurora (n) PRE 1608-TB3 offers many advantages, it’s important to note that when using USB connectivity, it is limited to 16 channels of I/O due to bandwidth restrictions.
The Lynx Aurora (n) PRE 1608-TB3, with its Thunderbolt connectivity and LM-PRE4 module, is a top-notch AD/DA converter that delivers exceptional sound quality and flexible connectivity options. Whether you’re recording drums or any other audio source, this device ensures that you capture every detail with precision.
What is an Audio Interface?
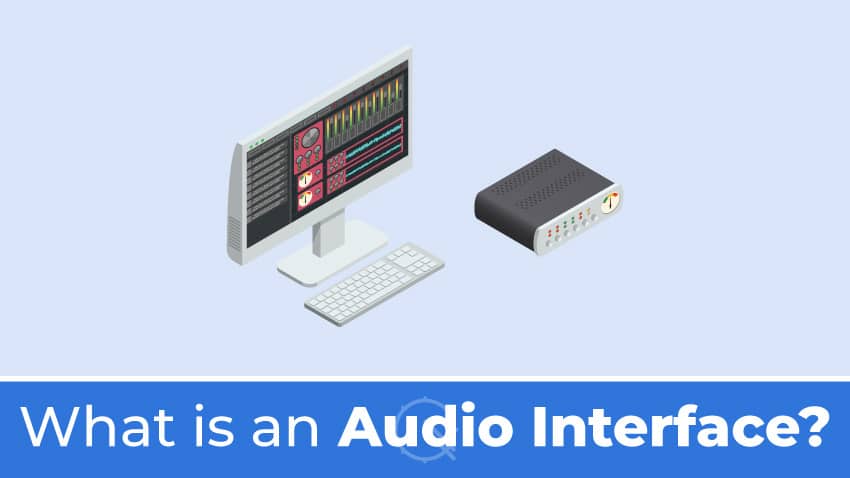
When recording in a home studio, it’s common to use what is known as an audio interface to convert audio from a microphone into digital data that you can manipulate inside a computer.
Interfaces contain microphone preamps that amplify the signal and sometimes, if desired, give the sound a “color” to make a record more unique.
Many modern records are made this way in home studios and basements worldwide. Technology has come a long way, and recording yourself has become affordable.
Audio interfaces come in various sizes and prices, ranging from one microphone input to eight. Specific audio interfaces can also be daisy-chained together to expand the number of microphones you can record simultaneously.
Factors to Consider when Buying an Audio Interface for Recording Drums
Several factors must be considered when choosing an audio interface for recording drums.
Firstly, compatibility with your recording software is crucial to ensure seamless integration and workflow efficiency.
Secondly, the number of inputs and outputs will determine how many microphones and other audio sources you can connect simultaneously.
Additionally, the interface’s sample rate and bit depth capabilities will impact your recordings’ resolution and fidelity. But in my experience, I still record at 44.1kHz. This is still the industry standard; no one listening (especially on an iPhone) can distinguish between 44.1kHz and 192kHz.
It’s also important to consider the quality of the preamps, as they will directly affect the sound capture and clarity.
Lastly, latency performance is vital for real-time monitoring and recording without any noticeable delay.
Compatibility with recording software
To ensure a seamless recording experience, it is crucial to consider the compatibility of the audio interface with your preferred recording software. Here are four key considerations to keep in mind:
- Software Compatibility: Make sure your recording software supports your chosen audio interface. Check the manufacturer’s website or product specifications for compatibility information. All the interfaces on this list should be compatible with most digital audio workstations.
- Driver Support: Verify that the audio interface has up-to-date drivers for your operating system (e.g., Windows, macOS). This ensures smooth communication between the interface and your computer. Be sure to check, especially if you own an M2 Pro/Max chip on the new Macbook Pros.
- Control Integration: Look for interfaces that offer dedicated control integration with popular recording software. This can include features like mixer control surfaces or plug-in mapping options. These capabilities can significantly enhance your workflow efficiency and ease of use during drum recording sessions (especially for monitoring while tracking).
- MIDI Integration: If you plan to incorporate MIDI devices or controllers into your drum recordings, check if the audio interface supports MIDI connectivity and integration with your software.
These compatibility factors will help you select an audio interface that seamlessly integrates with your recording software and meets all your drum recording needs.
Number of inputs and outputs
The number of inputs and outputs is crucial when choosing an audio interface for recording drums. An adequate number of inputs allows you to capture each drum individually, ensuring optimal sound quality and control during mixing.
Additionally, more inputs provide flexibility for adding extra microphones or capturing stereo feeds from drum pads or stereo room mic setups.
On the output side, having enough outputs enables you to connect multiple monitors or processors to monitor and process your recorded drums effectively.
Consider your desired level of complexity and expandability when selecting an audio interface with the right number of inputs and outputs for your drum recording setup.
If you’re recording drums, it’s best to keep it simple. You’ll still want to ensure you get an audio interface with eight preamps, but don’t expect to be recording a drum set the size of Neil Peart’s on day one.
To fully grasp the concept of recording drums, it’s essential to begin small, maybe a four-piece kit, and get the techniques correct.
You may even want to experiment with smaller microphone setups, as well. A good starting point is kick, snare, and overheads. This will give you minimal phase issues and a great sound when starting.
If you need more clarification about microphones, open the following link in another tab, as we’ve outlined the best starter drum microphone kits available.
Sample rate and bit depth
Now let’s talk about the importance of sample rate and bit depth in capturing the true essence of your drum recordings.
Sample rate refers to the number of samples taken per second during recording. At the same time, bit depth determines each sample’s dynamic range and resolution.
Choosing the right sample rate and bit depth is crucial for achieving high-quality drum recordings.
A higher sample rate, such as 44.1kHz or 48kHz, allows for a more accurate representation of high-frequency details, resulting in a more transparent and detailed sound. But despite this, I still recommend recording at 44.1kHz to save on disc space, processing, and no one will tell the difference in the final product.
Similarly, a higher bit depth, like 24-bit or 32-bit, provides greater dynamic range and ensures that subtle nuances in your drum performance are faithfully captured.
By selecting an audio interface with higher sample rates and bit depths, you can achieve professional-level drum recordings that accurately reproduce every detail of your playing with exceptional clarity and precision.
Preamp quality
Exceptional preamp quality is essential for capturing drum recordings’ true essence and raw power. It immerses listeners in a sonic experience that will leave them craving more.
When choosing an audio interface for recording drums, the quality of the preamps cannot be overlooked. Here are three key reasons why preamp quality matters:
- Transparent and accurate sound reproduction: High-quality preamps faithfully capture the original sound from your microphones without coloration or distortion. This results in a clean and transparent representation of your drums’ natural tones.
- Adequate gain and headroom: Preamps with high-quality components provide sufficient gain to amplify low-level signals from dynamic microphones used on drums. They also offer ample headroom, allowing you to record loud drum hits without clipping or distortion.
- Low noise floor: Good preamps have low self-noise, minimizing unwanted background noise during recording. This is particularly important when capturing subtle nuances and soft dynamics in drum performances.
Choosing an audio interface with exceptional preamp quality will elevate the overall sound of your drum recordings. It delivers professional-grade results that will impress both yourself and your listeners.
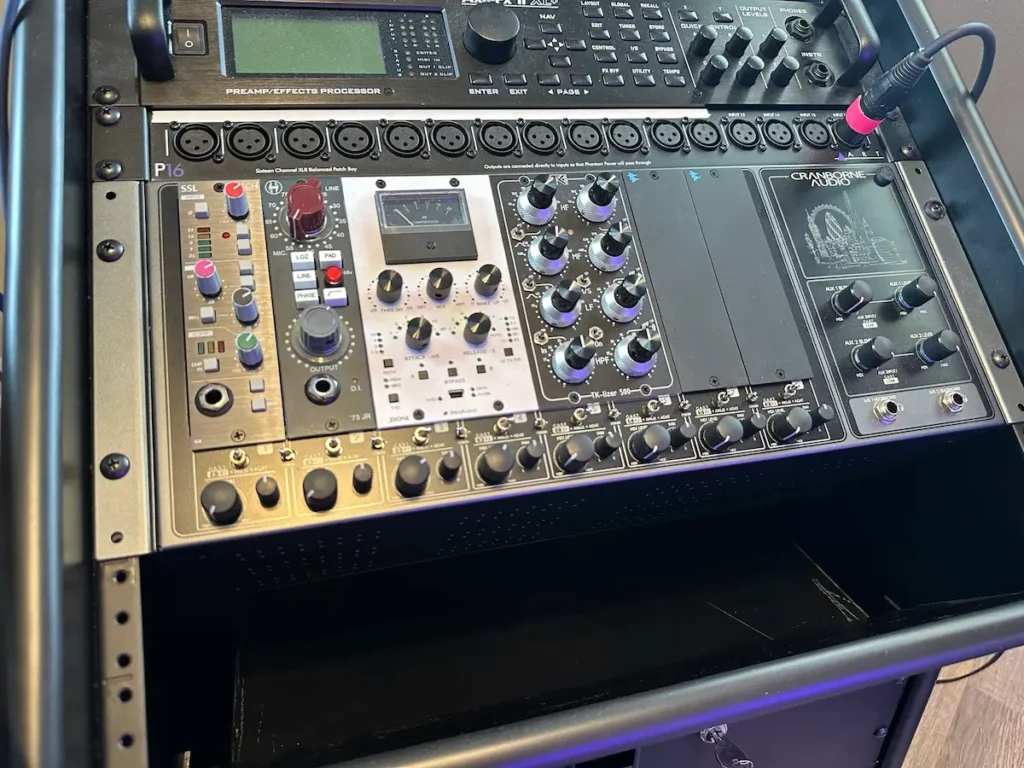
For a more professional, studio drum recording setup, you may want to go with an RME Fireface, Cranborne Audio ADAT500, and eight external 500 series preamps, like the Heritage Audio 73jr2. This professional setup will run you more than $15,000 dollars, so be aware. To put it in perspective, I use the ADAT500, but I only have two dedicated preamps that I use with the unit.
Latency performance
When capturing the energy and groove of your drum recordings, ensuring low-latency performance is crucial for a seamless and immersive recording experience.
Latency refers to the delay between when a sound is played or recorded and heard through the monitoring system. In drum recording, low latency is essential to maintain the natural feel and timing of the performance.
The best audio interfaces for recording drums prioritize low latency performance by utilizing advanced technology and high-speed connectivity options such as Thunderbolt or USB-C. These interfaces minimize the delay between input signals from microphones or electronic drum pads and their output through headphones or studio monitors, resulting in a more responsive and accurate monitoring experience for the drummer.
With low latency performance, you can focus on delivering your best performances without distracting delays.
Connectivity options
Take your drum recordings to the next level with the seamless connectivity options of today’s top interfaces. These interfaces offer a range of connectivity options to ensure compatibility with your setup and provide flexibility for recording drums.
Here are five key connectivity features to consider:
- USB-C: Enjoy fast and reliable data transfer between your interface and computer.
- Thunderbolt: Experience lightning-fast speeds for low-latency recording and playback.
- ADAT: Expand your input capacity by connecting additional preamps or digital devices.
- MIDI: Easily integrate MIDI controllers or trigger modules into your drum recording setup.
- Analog I/O: Connect external gear such as compressors or EQs for enhanced sound shaping.
With these connectivity options, you can effortlessly capture every detail of your drum performance and achieve professional-level recordings.
Budget
Affordability is a crucial factor when choosing a drum recording interface. As a drummer, you want an interface that fits your budget and provides high-quality sound and functionality. There are several options available that offer great value for the cost.
Consider the necessary inputs and outputs. Also, look for features like no-latency monitoring and bundled extras such as DAWs or plug-ins. Rackmount interfaces can provide more options and flexibility if needed.
While staying within your budget is essential, investing in a reliable and versatile audio interface will significantly enhance your drum recording experience and help you achieve professional-level results.
How much to spend on an audio interface?
If you’re new to recording drums, start small with an affordable drum recording interface.
As you move up the price ladder, you’ll find that spending upwards of $1,000 won’t change the quality of your home studio drum recordings.
As you “practice” recording and engineering more and more, you’ll find that your recordings will vastly improve despite the gear not changing.
The secret lies within the engineer and their ears.
Audio interfaces that range between $300 and $1,000 sound similar regarding preamps.
Some of the more expensive audio interfaces will offer things like DSP plug-ins, extra inputs, unique preamps, and so on. For just starting, this is nothing to concern yourself with.
Can I use a mixer instead of an audio interface for recording drums?
A mixer is unnecessary for recording drums, though some mixers have built-in audio interfaces. A standard audio interface with preamps, headphone output, and low latency is sufficient. A mixer may be used for live sound or routing signals, but an audio interface is recommended for recording purposes.
How many channels do I need for recording drums with an audio interface?
For the most basic setup, you can get away with recording drums with one microphone (a mono overhead placed relatively close to the drum kit). If you’re a complete beginner, start with a single-mic setup.
For a more advanced setup, you’ll want a minimum of four channels to record drums with an audio interface. This allows for individual mics on the kick, snare, and overheads. More channels provide greater control and flexibility in capturing the drum sound.
Do all audio interfaces for recording drums have built-in preamps?
Yes, all audio interfaces for recording drums have built-in preamps. Preamps are necessary to amplify the microphone signals before converting them to a digital format.
Can I use an audio interface with my iPad or iPhone for drum recording?
You can use an audio interface with your iPad or iPhone for drum recording. Many audio interfaces are compatible with Mac, PC, iPad, iPhone, and iPod. Just ensure that the interface you choose has USB-C or USB-A connectivity. And make sure the interface is compatible with iOS.
Conclusion
When recording drums, having a reliable and high-quality audio interface is crucial. The recommended interfaces include the following:
- Focusrite Scarlett 18i20 (3rd Gen) – best overall
- Behringer U-PHORIA UMC1820 – best budget
- MOTU 8M 24×24 – best quality for money
- Tascam US-1608
- PreSonus Studio 1824c
These interfaces offer various features, such as multiple inputs and outputs, mic preamps, and connectivity options. When choosing an audio interface for drum recording, it is essential to consider factors like the number of preamps needed and desired sound quality.
Ultimately, the choice will depend on individual needs and budget.

Great list! I use tascam
0
I’ve done LOTS of searching online in the last 48 hours and this may be one of the most productive articles yet.
One thing though… can I multitrack with the 18i20? … I’d like the ability to record to six or 8 different tracks so I can edit each drum mic separately.
Thank you.
Paul
0
Paul. Thanks for reading. You absolutely can multitrack with the 18i20. It’s probably the best bet for both value and versatility. Eight channels are plenty for doing kick, snare, toms, overheads, and rooms even. Depending of course on how many drums and microphones you have. 🙂
Another benefit to the 18i20 is the ADAT input/output on the back of the unit. You can buy another eight-channel preamp, like a second 18i20, connect 1 optical ADAT cable, and get a total of 16 separate microphone inputs.
0
I have been looking for a question/answer like this for weeks but never receive a clear answer. Thank you for addressing this. To clarify, if a purchase a USB interface (like one of the above you’ve mentioned) I can get 8 inputs that will remain as 8 tracks once they hit my PC? I currently have StudioOne (I read Presonus isn’t your favorite). Definitely need that full control to edit each track after the fact. Thanks again.
0
Yes! You will have control over each of the eight channels. Despite my negative view, I think StudioOne is a perfect option. In fact, I bet a lot of their newer products are much better than my FireStudio that never liked to work. I just had negative experience years back.
0
Hi Nick,
I got a ton of great info from this…
I am wondering what your thoughts are on this idea…
First of all, I am new to all this…
I am thinking of using overhead and kick mics to record. Then run the mics in to an amplifier head, then run the amp output in to a 2 channel audio interface, and then in to my PC (software)…
Will this Frankenstein setup actually record decent tracks? Should I use the amp settings to make it sound good or should I just set them all flat or something?
Also, I am really only trying to get scratch tracks, I am not producing an album or anything.
Thank you in advance!
0
Hey Jim, thanks!
I would most likely run the kick and overhead microphones directly into the audio interface and then, from there, manipulate the sound within the computer. That being said, give it a shot! Try recording through the amplifier head to see what kind of results you get!
Let me know if you have any other questions!
Nick
0
Wow can’t believe I found this! Just got off the phone with a Sweetwater consultant inquiring about the 18i20. Great info Nick thanks a lot. Can you recommend a decent recording software and are they hard to learn?
0
Hey Joe,
Glad Sweetwater was of aid to helping you pick!
Regarding the varying recording software, The 18i20 comes bundled with Pro Tools | First and Ableton Live Lite. Lots of recording studios still use Pro Tools, so I don’t think this would be a bad place to start.
There definitely is a learning curve, so be aware (you’ll be on YouTube for a while learning, I’m afraid). I like Cubase, myself, but all digital audio workstations get the job done and it’s subjective. There is no difference in audio quality between the differing software. It’s all about the source you record, the microphones, and sometimes the microphone preamps (last 5% of the sound IMO). Fresh heads, a decent room, and some good mics will get you 95% of the way to a good drum recording.
Hope that helps!
Nick
0
Thanks Nick. I forgot to ask one more question. Can you play to drum-less tracks with the 18i20 while listening through headphones?
0
Yes. I am able to listen to YouTube, Spotify, my library, drumless tracks, loops, etc… while playing along with my setup.
The 18i20 uses Focusrite Control (software that comes with) that you’ll adjust levels with.
0
Hello! This is very informative.
I am new to this, and I am confused of what to use in drumming. sound card or a mixer? Some say mixer and some say soundcard like focusrite with 8 channel.
Please help.
0
Hi,
I suppose it somewhat depends on what you’d like to do. Mixers are easier to use and often don’t require a computer. You could use a mixer if you’re just looking to hear your miked drums with in-ear monitors or headphones.
A lot of mixers also have a built-in audio interface (soundcard as you refer to it). In my experience, I’ve always liked using standard audio interfaces more — especially the Focusrite 18i20. For the price, you can’t beat it. I also own UAD and MOTU stuff (too expensive).
I should also mention, I’m mainly talking home recording for drummers who want to record themselves. There’s a LOT better options out there once you cross the $2k-3k mark in terms of recording interfaces, but at that point you’re better off going to a professional studio.
0
Hi is the headphone out loud enough for recording drums on the Scarlett? I have a steinberg and even with the volume turned all the way up, I still hear my drums over the track.
0
Hey Greg. I’ve had this problem in the past before, as well. Sometimes it can be difficult to setup a monitor mix that is loud enough if you’re just monitoring on the way in. The Scarlett most likely won’t be a fix to this issue.
You could try some pre-processing inside your DAW and monitoring from there. Else, something I can’t recommend more, is getting a pair of GK Ultraphones. They have insane isolation and sound incredible. I can’t imagine tracking drums without them after trying them out.
0
Hi Nick,
Thanks for the article brother. It reaffirmed my purchase of the Scarlett and the Octo-Pre. I’m recording projects with this equipment that have gotten amazing results. My best bud who I grew up with sings with the AWB and thinks the project s I’m recording sound awesome. My question Nick is, I’m trying to lay down separate tracks with a Yamaha DTx12 in Protools as percussion tracks i.e. bells, claps etc.
I don’t know how to connect the DTX to the Scarlett and then hear them as separate tracks.
Any help you can offer would be awesome. Thanks Nick.
Rich Latimer – Drummer
0
Hey Rich! Awesome to hear it.
There’s really two ways you can connect your DTX to Pro Tools: via MIDI USB or recording the LR output of the DTX with a DI box. Recording the LR output will give you access to the sounds included with the Yamaha DTX.
Recording the MIDI USB information allows you to use software/samples for additional sounds.
I’m curious to what you mean… “hear them as separate tracks.” Are you trying to separate each of the pads and then mix them independently later on? Unfortunately, there’s no simple solution, since the DTX only gives us a stereo output. There is a work around, and I’ll explain it further if this is what you’re talking about!
Cheers
0
Hello Nick,
Some really great information in the article.
I’m interested to know about the work around regarding recording and mixing electronic drum pads individually when you usual only have a stereo out from the brain.
Many thanks
0
Hi Val! Thanks for the kind words! Unfortunately, there’s no easy solution when using only stereo out. You’ll have to pre-mix the pads, as there’s no way to change levels once the audio passes through the stereo out. The work-arounds are as follows, but aren’t totally useful:
1) Record each pad individually with your DAW and create separate tracks.
2) Record the MIDI performance and feed the MIDI back to your pad, recording each separately (using a USB cable).
3) Record MIDI into your DAW and use a drum sampler like Battery (using a USB cable).
Hope that helps! Please let me know if you have any other questions or if I missed your intent.
0
Hi there,I’m looking for a good interface Scarlett 18i20 and Tascam 16×08 to record my drum kit
The question I have is the Scarlett 18i20 come with Protools First but it says you can only record 4 tracks simultaneously
The Tascam doesn’t come with DAW software but I was thinking of using the free Cakewalk Daw
Regards Pete
0
Hello,
This is very informative, thank you very much. I did tests with a Behringer I borrowed, and actually it is not usable. Sounds from mic > audio interface > Cakewalk (for EQ,…) > audio interface > my headphones : Latency is too big. I’m playing with a mixer right now and there is no perceptible latency. So, is this setup (mic > scarlett > daw > scarlett > headphones) possible with no perceptible latency? As I don’t want the raw sound of mics in my headphones, but the mixed sound out of Cakewalk. Or maybe a mixer/audio interface as Zoom Livetrack or Soundcraft MTK would better fit my needs? (main use is live streaming drums)
Thank you very much again.
0
HI Quentin. You’ll want to use Direct Monitoring. There should be a setting in the Scarlett settings. The only issue—you won’t be able to use your DAW effects with your headphones. If you want to use your DAW still, you can try lowering the buffer on the interface to get lower latency. More: https://support.focusrite.com/hc/en-gb/articles/360006972599-Direct-Monitoring-on-the-Scarlett-4i4-3rd-Gen
0
Hello! Quick Question;
Juuust starting out in this side of things and i have a couple green questions; If we’re playing live and im micing up the drums and running guitar and bass into the interface, is there a way I can run it into a PA and also into logic or some other recording mixer? I bought a roland go mixer thats pretty cool and use a board to run everyone into and back into the roland go mixer. but its really hard to get the levels right. Also, if all of my drums are mic’d individually, is there a way to lock in each level to adjust the drums entirley once im trying to get the volume lined up with the other instruments? hopefully this makes sense. any advice is appreciated.
0