We may earn a commission from the affiliate links on this site. Learn more›
“A great drummer can make a terrible band sound good, just as a great snare drum can make a poor drum set sound great.”

Learning the art of care and maintenance of your drums is one of the most invaluable things you will learn as a drummer.
While there are a plethora of different types of drums you will encounter in your career (whether hobby or professional), there does seem to be one drum that is at the heart of Western music: the snare drum.
Generally, a student learning drums and percussion in the West will spend a minimum of two years on the snare drum alone before moving on to the drum set and other percussion.
This is to develop all the fundamentals of playing, reading, counting, and listening.
Establishing these fundamentals helps provide a group of solid core skills that will eventually transition over to other percussion instruments.
The snare drum is king
In most clubs that offer a backline drum set, it’s generally accepted to bring your own snare drum and cymbals as most of these kinds of drumsets have not been maintained well.
In fact, it’s very common for drummers to share drum shells on tour even.
In a recording situation, however, a drummer may have dozens of snare drums and may use multiple drums on just one album.
Sometimes a certain sound just fits a certain song. Depending on the producers and engineers, they may request trying different drums in a recording situation.

It’s truly astonishing how many different types of snare drums are available today.
There’s everything from maple, birch, mahogany, bamboo, aluminum, steel, brass, copper, and the list goes on further.
Pick up a catalog from your favorite instrument retailer and you’ll be shocked at how many different sizes and types are made.
The snare drum is such an important drum that many drummers even use two in their setup!
So while this might not be the most exciting topic in the world, it is important.
We drummers spend lots of precious money on our drums, so we ought to take good care of them so they last.
We will be covering all the variations of cleaning, assembling, and tuning your drums. Be sure to bookmark this page to keep it as a reference in the future!
Here’s what we will be covering in this maintenance guide:
- Basic drum anatomy – How components affect sound and tone
- Basic maintenance – Disassembly, assembly, inspection, cleaning, repairs,
- Tuning and snare strainers/throw offs – How to use and adjust
- Technique and striking the drum – Basic concepts for playing and techniques
Anatomy of a snare drum

Materials
- Wood – maple, birch mahogany, jara, beech, bamboo
- Metal – aluminum, steel, brass, copper, bronze
- Other – Carbon fiber, acrylic, impregnated wood, “cymbal alloys“
I happen to personally like the sound of wooden snare drums.
They have a bit of a warmer tone and each has its own distinct character.
This is just to my ears, however. Whichever type of snare drum you like will be up to you.
Let’s talk diameter and depth
The typical standard snare drum you will find is 14″ in diameter and 5.5″ in depth. Why is this the accepted standard?
I believe this size drum allows for the widest range of tones, offering both a high-pitch choked piccolo sound as well as a fat detuned thick sound.
Despite that being standard, it didn’t stop A&F Drum Co. from creating what I believe is the world’s largest snare drum (in diameter, at least).
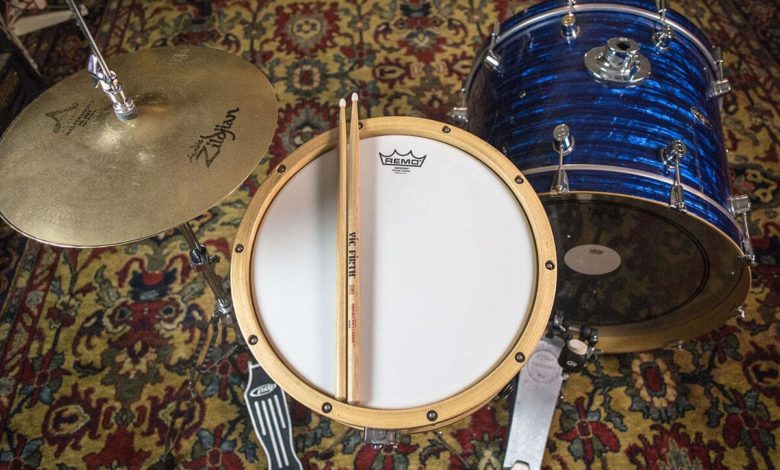
Snare drum heads
Snare drums contain two heads: batter and resonant. The batter is referred to when speaking of the side of the drum you hit.
The resonant head is the side of the drum that the snare wires are attached to. Both hold very specific functions and the sound of your drum will vary greatly depending on how these heads are tightened.
These are two different types of heads. Be sure to not mistakenly buy two batter heads at the store.
Why? The snares that rest under the resonant head will not fit properly onto a regular batter head.
Types
Drum heads are generally made from the following materials:
- Plastic – cheap, very common
- Calfskin – older drums, traditional sound
- Kevlar – used for marching snare drums exclusively

Single plys tend to have more attack and are brighter whereas double plys are thicker sounding and are darker in tone. Both these variations come in either texture coated or clear and may consist of a dot for further tone control.
I tend to like the sound of the Controlled Sound from Remo, but your experience and taste may vary.
Some of the overtones are muffled and, thus, negates the need for a ton of dampening.
If you have no idea what any of this means, don’t worry, we’ll be getting into it much later.
Some drum heads, like the Aquarian Superkick and Evans EMAD bass drum heads, have internal muffling systems (rings) that help give the drum a more-rounded tone.
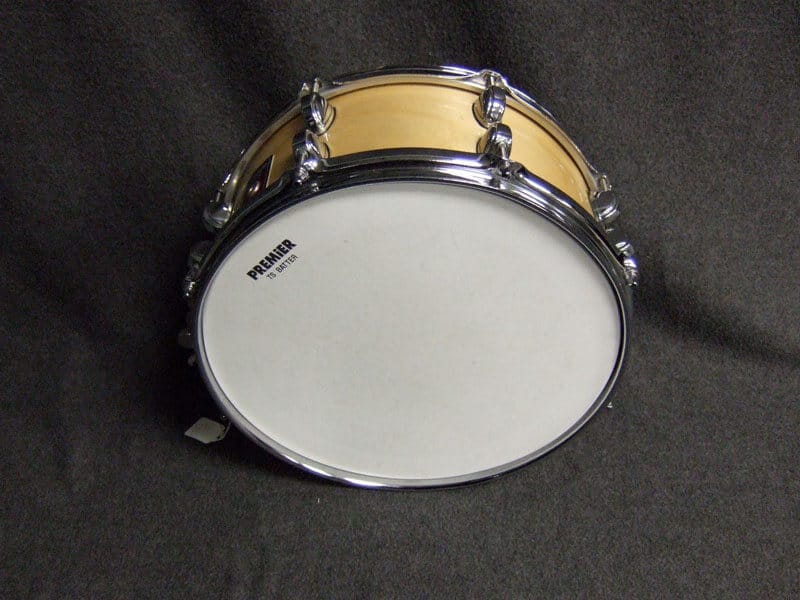
Counterhoops (rims)

The
The number of lugs a drum has will determine the number of holes a rim has for tension rods.
The rims of a snare drum will have two “snare gates” that allow the snares to feed through the rim to lay evenly on the resonant head.
All the snare drums I own have die-cast counterhoops, but I long for the day when I get a snare drum (or maybe an entire kit) that has wooden rims.
I love the sound and feel they give. It’s almost as if the heads stay in tune better due to the softer nature of wood, but I might be nuts.
Snare wires

Moving on to the wires that bring your snare to life, snare wires are either made of steel or plastic.
These wires lay across the bottom of the resonant head and vibrate against it when the drum is struck.
Steel wires are far more common and will give you that crispy crack we all know and love.
Historically, snare wires used to be made literally from animal guts and were stretched across the bottom head. Fortunately for us in modern times, this is no longer the case.
The sound is imitated by its plastic counterpart. These wires tend to be much darker in tone and are used with field drums and certain concert snare drums.
The snare wires are controlled by what is known as the snare strainer and throw-off mechanism.
The strainer and the throw-off

Simply put, the strainer holds the wires and the throw-off controls whether or not the snares are “on“ or “off.”
The throw-off also controls how tightly your wires come to the resonant head, allowing for loose snares with a long decay or tight snares with a crisp attack.
The tension on the wires is controlled by an adjustment screw. You can see the screw in the image above on the left-hand side.
On higher-end snare drums, there is often a “preset switch” that allows drummers to have multiple settings for tight, loose, and medium snare wires, allowing them to switch quickly in a certain section of a song or piece.
Drum muffling
Muffling or dampening drums is very popular these days (especially since the 70s).
Dampening a drum can be achieved by one or a combination of the following methods:
External dampening
- Tape – gaffers tape preferably
- Cloth – some drummers throw a tee shirt over their snare drum to get a really dead sound
- Moongel (or similar products) – these types of products are intentionally designed to deaden overtones from any given drum
- Wallet – this technique is somewhat
unconeventional , but does work well
Internal dampening
Some drums themselves have internal muffling systems, but these are mostly on older drums.
On these drums, a metal bracket holds a piece of felt to the underside of the batter head and can be adjusted with a screw on the outside of the shell.
Personally, I’ve always thought that internal drum dampening systems sound bad and have always loved using Moongel. Most newer drums don’t come with internal muffling, so you’d have to add one aftermarket.
I could be wrong, but I believe the reason most companies ditched this system was due to the fact that these components would rattle around.
I remember being in sixth-grade band playing on an old snare drum and this was a huge problem.
Essentials for snare drum maintenance
In order to be an effective drum technician, there are some products you’ll want to keep handy.
Now you’ll be using some of these more often than others, but you’ll still want to utilize them all to maintain your drums to keep ’em new.
Drum keys

If you’re new to drumming and do not know what a drum key is, allow me to explain.
Drum keys are required to make any tension adjustments on your drums. The key is used on the tension rods located above the lugs.
When you want to change heads, re-tune your drums, or even make an adjustment on your kick drum pedal, you’ll need your drum key.
I recommend keeping two at all times. For one, drummers tend to lose drum keys all the time (they are small after all.)
In the strange event that one happens to break or strip, you’ll have a backup as well.
If you have any drum gear already, I’m sure you have a key somewhere. Most drum equipment comes packed with at least one key.
Types of drum keys
The picture referenced above is your standard drum key. Let’s take a look at the other types of drum keys available:
- Standard drum key – you probably already own one
- Ratchet drum key – great for removing heads fast
- Torque drum key – great for tuning accurately
- Drill bit key – great for changing heads fast, not for accurate tuning
- High tension key – great for marching drums that need extreme tensions to tune Kevlar heads

Now you don’t need to have all the different types of keys. Even though I don’t use marching drums, I personally love high tension keys.
They’re larger, won’t get lost as easily, and make tuning drums a lot easier.
Phillips, flat-head, and allen wrenches
Drum keys only cover one part of the equation: tension rods. For all other hardware components, you’ll need these tools.

Two Phillips head screws are generally used to hold the lugs to the shell of the drum. If you ever need to replace or change the lugs of a drum, you’ll need a screwdriver.
Some parts, though uncommon, will require the use of an Allen wrench as well.
My ride cymbal stand, in particular, has a very small Allen wrench bolt that I need to constantly keep tight, otherwise the stand spins very easily. It’s definitely worn out. Maybe it’s time for an upgrade!
Why the need to remove these parts?
Sometimes the springs inside of a lug can go bad. In this case, your tension rod will no longer tighten like it used to (or sometimes not at all) and you’ll be required to replace a lug.
You can definitely ignore it, but the tuning and sound of your drum will suffer severely.
Fine steel wool
For those of you with metal-shelled drums, I suggest searching around the house for some fine steel wool.
In the event that your drum begins to rust, you can remove the hardware components and lightly polish the bad areas to get rid of as much rust as possible.
You won’t completely restore your drum back to its former glory, but it can slow the rusting process giving you some more life out of your drum.
Fine-grit sandpaper
Now, on to our wooden counterparts. For wood drums, we sometimes see small inconsistencies in the bearing edge of a drum.
Using fine-grit sandpaper, we can level some of these out.
Before you do any modification to your drums, know that this is an extremely delicate process, and you only need to make tiny tweaks.
You can very easily wreck your drum by sanding away too much of the bearing edge. I have done this before.
Fortunately, it was on a drum I didn’t care too much about.
Below is a fantastic video detailing how you can check your own bearing edges.
The goal here is to get the drum head seated better on the bearing edge. If the head isn’t seating properly (you’ll know when you drum won’t tune properly), you may need to make this adjustment.
If this doesn’t solve the issue, the drum shell itself could be warped.
Graphite-based lubricant
Here’s an example of something I need to do more often. Using a graphite-based lubricant, you can keep your metal hardware in better shape.
By applying this lubricant to your stand collars, they will slide better and last you much longer. Be sure to use it conservatively and keep away from any plastic parts.
Vaseline
Our tension rods need some love as well. Over time, after tuning and changing heads, tension rods will begin to feel more resistant as we screw them in.
I suggest you apply a little bit of synthetic grease once every few months to keep your tension rods and lugs in top shape.
Household paraffin wax
One of my all time favorite maintenance hacks for drums is using wax on the bearing edge. The wax will seal the drum head to the edge, stop it from binding, and the head will vibrate a bit better.
Using the wax, circle around the bearing edge lightly a few times and be sure to clean any excess wax that falls into the drum as you go.
Metal polish
Chrome hardware parts can look terrible after years of use and abuse. Metal polish is great for keeping your drums looking shiny.
Be sure to use a good-quality paste or liquid. You’ll be able to clean anything hardware that is chrome or nickel.
Some polishes are very harsh and can scratch, so be careful the first time you attempt polishing.
Glass cleaner
My go-to quick clean solution for all hardware and parts is glass cleaner! I can’t tell you how many bottles of this stuff I’ve gone through.
Glass cleaner can be used to get rid of minor dirt and build up. Think of this as a weekly regimen to implement.
Windex works great; any generic brand will do as well. Make sure it has ammonia and don’t use this on your shells, please.
Well-lit work space
A pretty obvious one, but important nonetheless. When operating on your drums, be sure to put a tee shirt down or a towel to prevent your bearing edges from being damaged.
Drum disassembly
Now that we have the tools you need out of the way, let’s talk about how to take your drums apart. Make sure you take note of how these parts are put together so you don’t get lost when it’s time to reassemble.
There will be lots of tiny screws and parts, so be sure to work in a clean area where parts won’t get lost.
I like to use small plastic baggies and label them with a sharpie: lug screws, lugs, tension rods, washers, etc.
Remove tension rods
Using a drum key, begin to unscrew all the tension rods from the lugs. I have found that you should keep the same tension rod in the same lug it was removed from.
Side note about lugs
Prior to threading the tension rods back into the lugs, use a pipe cleaner or cotton swap with some rubbing alcohol to clean the inside of the lug.
The tension rod threads are used to being threaded in their respective lugs, so as soon as you remove the rim and drum head, thread the tension rods back in the same lug they were removed from.
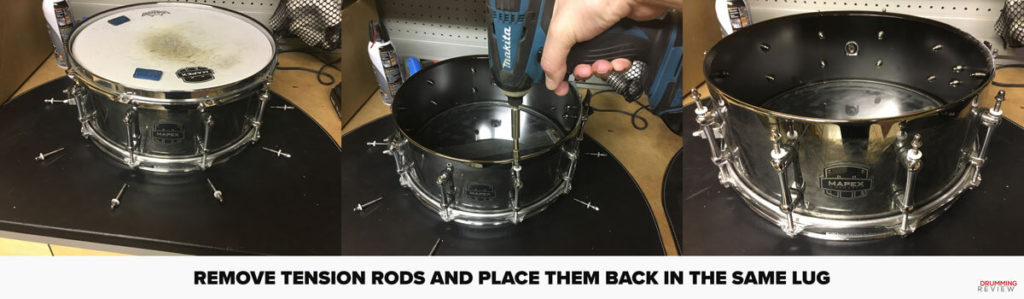
If you don’t do this, when you go to reassemble your drum, the tension rods may seem very tight and can potentially strip the threads inside the lug.
Also, be sure to keep the washers with the tension rods! If you lose these, they can penetrate the
For any rusty or dirty tension rods, steel wool is your best friend! If you notice any bent or stripped rods, be sure to replace them.
Repeat this process for the bottom head. Put the
Remove snare wires
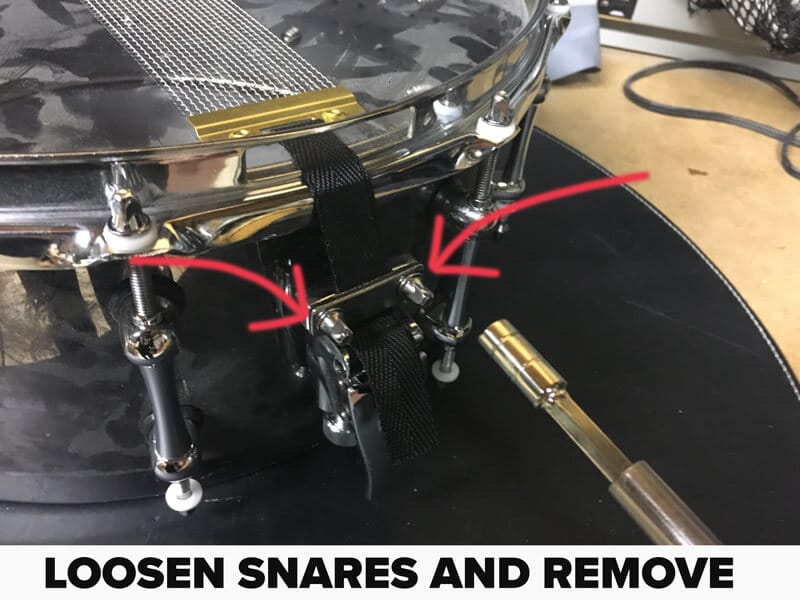
If working on a snare drum, you’ll need to use a drum key to loosen the snare wires from the strainer mechanism.
The best way to do this is to release the mechanism so the snares become loose. Using a drum key (or screwdriver if your drum is older) loosen the screws on the throw off switch holding the snare wires.
Once the snares are off, you can repeat the top head process. Make sure to keep the plastic tabs that hold the wires with your snares.
Inspect the shell
Being that my example is a metal shell, these next steps aren’t as applicable to my drum. Let’s pretend it’s a wood snare drum.
The next step is to check the bearing edges for nicks or dents. Use your hands to feel along the edge.
It should feel smooth as if it had just been sanded (if the drum is relatively new).
If you do notice imperfections, take a fine-grit sandpaper and lightly sand the bearing edge.
Remember, we’re just taking a tiny amount off to remove the imperfections to help the drum head sit better.
You do not want to change the profile of the bearing edge.
Next, take a clean, damp cloth and wipe away any remaining excess sawdust.
If you notice any major cracks or imperfections, you’ll need to take your drum to a professional. Continuing onward in a DIY fashion can permanently damage your drum.
If you’ve been wondering why your drum doesn’t sound great, chances are the bearing edge is at fault.
Repairing wooden shells
If you’ve reached the point of no return and want to attempt repairing your shell, here’s how to do it.
First, before making any modifications, try to figure out what caused this damage in the first place.
Was it a used drum? Is it something in your playing style?
The goal is to reduce the chance of this happening again so you don’t waste money in the future.
Using wood filler
If you notice spots or cracks that are potential candidates for wood filler, go for it. Apply to the spot (don’t force it) and let the compound dry. Once dry, reapply if necessary.
Next, lightly sand the repair area and repeat as needed across the drum shell.
Cleaning wooden shells
If you’re shell is in good shape and just needs a little TLC, here’s how to go about it.
Make sure your shell has either a polyurethane or a lacquer finish before using this method.
For light dirt, use a sponge with soap and water to clean the shell. Dry it immediately after.
For any major smudges or scuffs, window cleaner and a clean rag can work wonders.
And finally, for anything extreme, you can use paint thinner or nail polish remover on your drum (at your own risk!). I suggest staying away from this unless it is a last resort.
Cleaning metal shells
For metal shells, I like using window cleaner the best, once again. It’s perfect for minor dirt and smudges.
If cleaner isn’t getting the job done, you can always use mild soap with water, as well. Be sure to dry it immediately.
Metal polish to finish
You can bring out the metal polish to make your drum shine. Check your local hardware store for polish made for automobile chrome.
Apply the chrome with super fine steel wool. Use a polishing pad in a circular motion to finish the job.
Rusted shell?
Often too much exposure to moisture and humidity can render itself in the form of rust on your drums. It’s time to bring out the steel wool.
In addition, you can use a wire brush in extreme cases. Try your best to keep your drums in a well-ventilated and dry place when not in use.
Storing your drums
As a general rule of thumb, I believe it’s a good idea to remove the tension from your drums when putting them away for a while.
Instead of leaving that snare cranked up, back off the tension before you put it away. It might save a lug or two.
Closing
Keeping your drums maintained is very important, especially if you want to extend the life of your instruments. It’s not necessarily fun or glamorous, but is necessary.
I hope that following the steps in this guide has helped you grasp a better
Now let’s move on to the next topic: how to tune a drum set.
If you’ve made it this far, you’re no doubt a great reader. If you think I’ve missed anything in the guide, please feel free to leave me a comment down below. Thanks for reading!
Images credited to themusicgrove via Flickr


I’m looking for some more detail about removing, and maintaining the lugs as well as the snare throw-off mechanism? I’m about to try this for the first time with a worein out, work horse of a snare drum. 🙂
0
Coat chrome parts with Dawn dishwashing liquid, let the magic happen for 24 hrs, rinse, dry, results better than hand polishing.
0
“Drum Tuning Bible” Steve Johnson. As a guitar player with a kit in my studio his PDF is priceless! This is also a great site I just found!
0